Mastering the Art of Carving Decorative Butter for Presentations
Understanding the Basics of Butter Carving
Butter carving is an age-old technique that transforms simple butter into stunning works of art. At its core, it requires a good quality butter that holds its shape well, ideally kept chilled before use. Understanding the properties of butter, such as its firmness and temperature, is essential to achieving the best results.
Art is the most beautiful of all lies.
The tools you choose can make a significant difference in your carving journey. Simple items like a butter knife, a vegetable peeler, or specialized carving tools can help you create intricate designs. Familiarizing yourself with these tools will boost your confidence and allow your creativity to flow.
Before diving into carving, practice basic shapes and patterns. Start with simple flowers or leaves, and gradually work your way up to more complex designs. This foundational practice will not only enhance your skills but also make the process enjoyable.
Choosing the Right Butter for Carving
Selecting the right butter is crucial for successful carving. Look for high-fat content butter, like European-style butter, as it tends to be firmer and more manageable for intricate designs. Additionally, unsalted butter is often recommended since it allows for cleaner cuts and more precise details.
Temperature plays a significant role in the carving process. Ideally, you want your butter to be cool but not frozen, which allows for easy manipulation while still holding its shape. Finding that sweet spot can take a bit of experimentation, but it's key to achieving the best results.
Choosing Quality Butter Matters
Selecting high-fat, unsalted butter at the right temperature is essential for successful carving.
Don't be afraid to experiment with flavored butters as well! Adding herbs or spices can elevate both taste and presentation, making your creations not just visually appealing but also delicious. This can add an exciting twist to your butter carving endeavors.
Essential Tools for Decorative Butter Carving
Having the right tools can make all the difference in your butter carving experience. Essential tools include a sharp paring knife, a spoon, and a palette knife to help shape and smooth the butter. Each tool serves a unique purpose, enabling you to achieve various textures and details.
Creativity takes courage.
Consider investing in specialized carving tools like a butter sculpting set, which often includes various knives and scrapers designed for intricate designs. These can help you create fine details that make your butter stand out on any platter.
Remember, your hands can also be effective tools! Use your fingers to gently mold and shape butter, giving you a more tactile approach to your creations. This hands-on method can often lead to unique designs you might not have thought of otherwise.
Techniques for Intricate Butter Designs
There are several techniques to master when it comes to creating intricate butter designs. One popular method is the 'carve and peel' technique, where you carve away layers of butter to reveal beautiful shapes underneath. This method can create stunning textures and dimensions in your designs.
Another effective technique is using impressions and molds. You can press various objects into softened butter to create patterns or textures before carving into them. This approach not only adds depth to your designs but also allows for creative exploration.
Tools Enhance Your Carving Skills
Using the right tools, from knives to sculpting sets, can significantly improve the intricacy of your butter designs.
Practice is key in mastering these techniques. Don't hesitate to try different styles and methods to see what resonates with your artistic vision. Each attempt is a step toward creating beautiful, eye-catching butter sculptures.
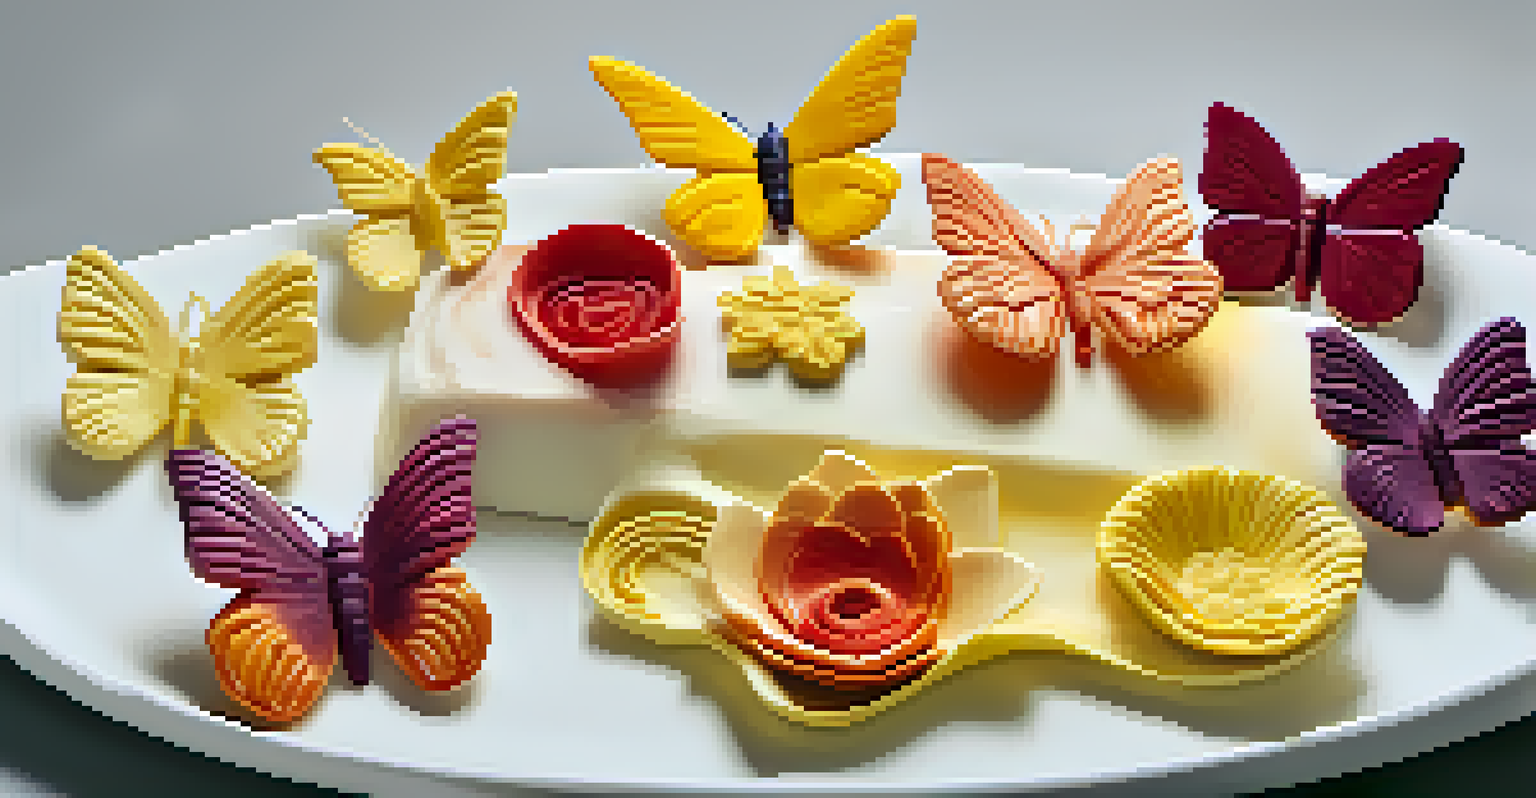
Incorporating Colors and Flavors into Butter Art
Adding colors and flavors can elevate your butter art to a whole new level. Natural colorants like beet juice or turmeric can be used to tint your butter, allowing you to create vibrant designs that catch the eye. This not only enhances the visual appeal but also adds a unique twist to the taste.
Flavored butters can also be made by incorporating herbs, spices, or even citrus zest into your butter mixture. This adds an exciting dimension to your creations, making them not just beautiful but also delicious. Think garlic herb butter roses or spicy paprika butterflies!
Experimentation is key when it comes to colors and flavors. Don’t be afraid to mix and match to find what works best for your palate and presentation needs. This creative process can lead to delightful surprises and unique butter art.
Presenting Your Decorative Butter Creations
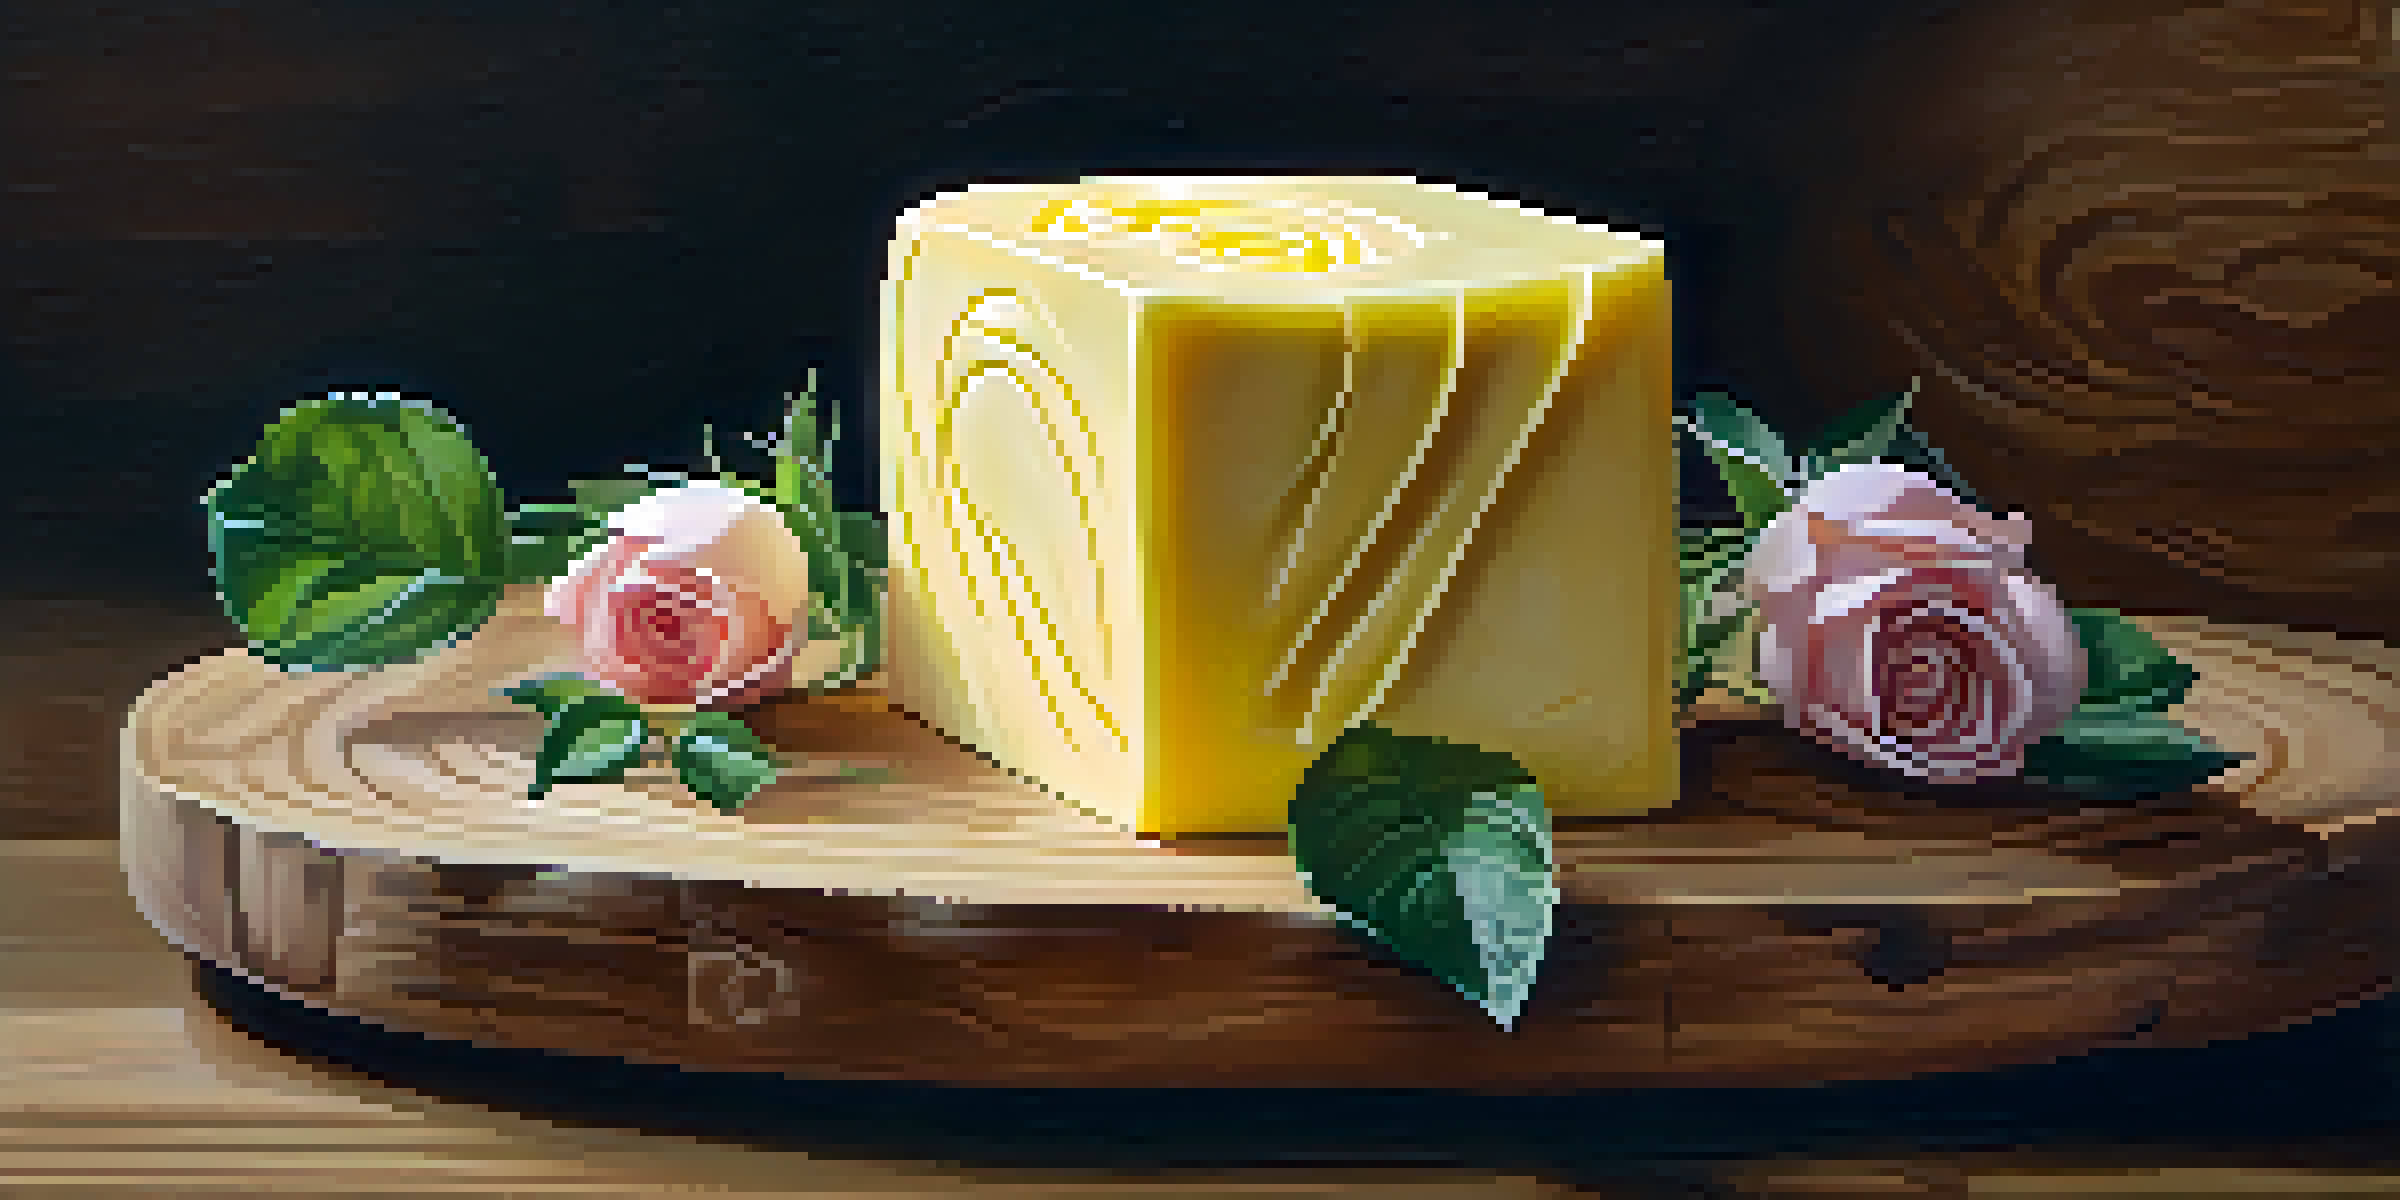
Presentation is just as important as the carving itself. Consider the serving dish you choose; a simple platter or a rustic wooden board can enhance the look of your butter art. Arranging your butter sculptures with complementary items like fresh herbs or edible flowers can create a visually stunning display.
Lighting can also play a crucial role in how your butter sculptures are perceived. Natural light can enhance the colors and textures, making your creations pop. Positioning your display near a window can bring out the best in your decorative butter.
Presentation Completes the Art
Thoughtful presentation, including serving dishes and lighting, elevates the visual appeal of your decorative butter creations.
Finally, remember to think about the context in which you're serving your butter. Whether it's a family gathering, a wedding, or a dinner party, tailor your presentation to suit the occasion. The more thought you put into the overall setup, the more impactful your butter art will be.
Maintenance and Storage of Decorative Butter
Once you've crafted your decorative butter, proper storage is essential to maintain its beauty. Keep your butter sculptures refrigerated until you're ready to serve, which helps preserve their shape and freshness. A covered container can protect your art from unwanted odors and contaminants.
If you're preparing your butter in advance, consider wrapping it in wax paper to help maintain its form. This can be especially helpful for more intricate designs that might be prone to melting or losing shape over time.

Always remember to enjoy your creations while they’re fresh! Decorative butter is best served within a few days of carving, so plan your presentations accordingly. This ensures that your guests can appreciate both the aesthetics and the taste of your hard work.