Techniques for Achieving Floral Patterns in Wood Carving

Understanding Floral Patterns in Wood Carving
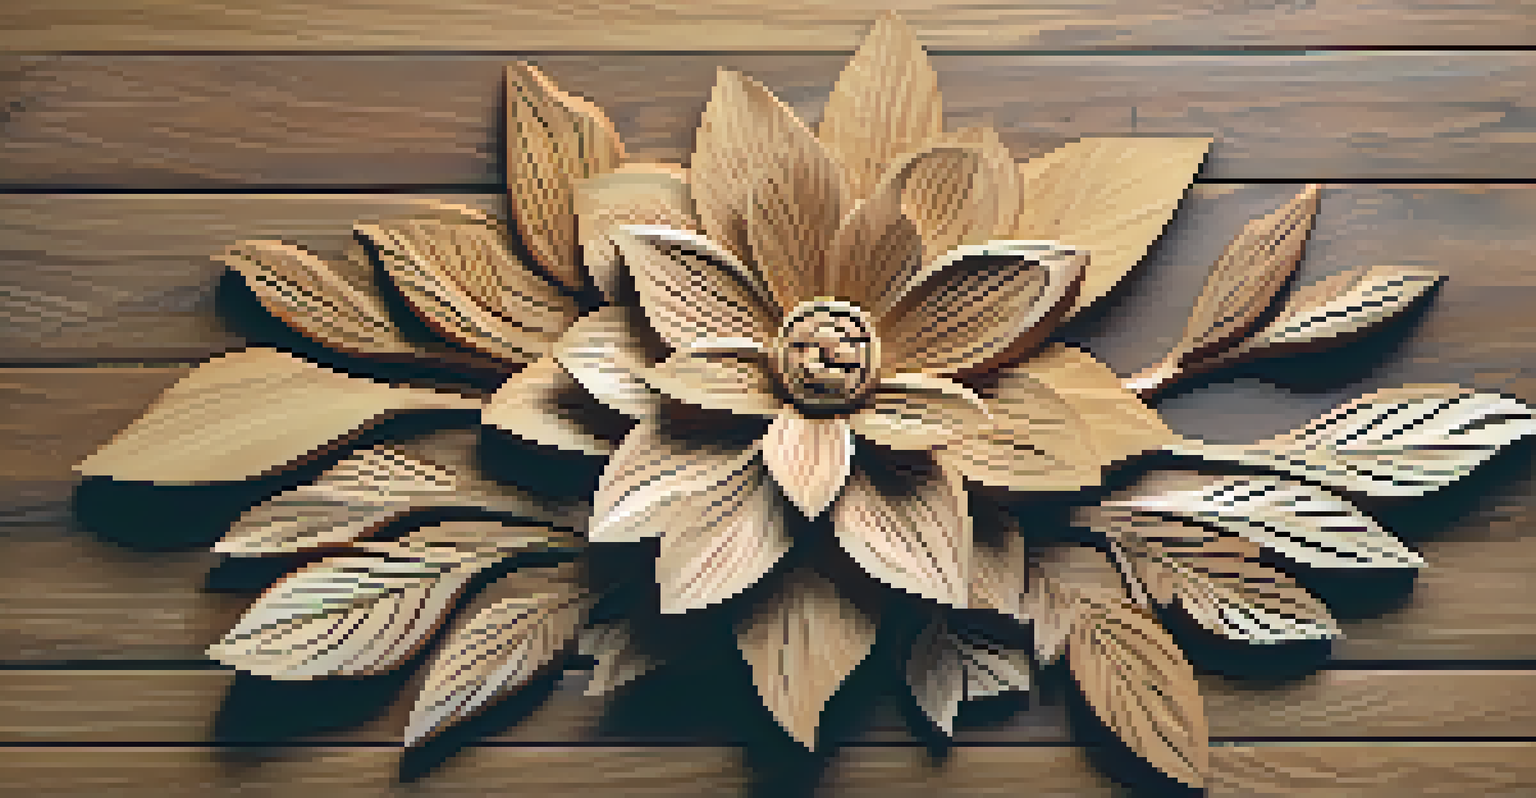
Floral patterns in wood carving have been cherished for centuries, often symbolizing beauty and nature's elegance. These patterns can range from simple blooms to intricate designs that tell a story of craftsmanship. Understanding the basics of these patterns is essential for any woodcarver looking to enhance their skill set.
The beauty of wood carving lies in the details; every cut tells a story.
At their core, floral designs often involve a combination of curves, lines, and shapes that mimic real-life flowers. This requires a keen eye for detail and a good understanding of how to translate two-dimensional ideas into three-dimensional forms. If you’ve ever admired a beautifully carved flower, you’ve likely seen how depth and shadow can bring it to life.
Moreover, floral patterns can vary significantly across cultures and styles, from the delicate cherry blossoms of Japanese art to the bold lotus motifs found in Indian carvings. By studying different styles, you can find inspiration and techniques that resonate with your artistic vision.
Choosing the Right Tools for Floral Carving
Selecting the appropriate tools is crucial for achieving beautiful floral patterns in wood carving. Common tools include chisels, gouges, and knives, each designed for specific tasks. For instance, a V-tool is perfect for creating fine lines and details, while a larger flat chisel can help with broader strokes.

It's also essential to consider the type of wood you're working with, as different species offer varying degrees of hardness and grain patterns. Softer woods like basswood are easier to carve but may not hold intricate details as well as harder woods like walnut or cherry. Choosing the right combination can significantly impact the outcome of your floral designs.
Floral Patterns Enhance Wood Carving
Understanding floral patterns is essential for woodcarvers to elevate their craftsmanship and create stunning designs.
Finally, don't forget about the finishing tools! Sanding pads and finishing oils can enhance the visual appeal of your carving, bringing out the natural beauty of the wood grain. Proper finishing can make your floral patterns pop and add that extra touch of professionalism.
Sketching Your Floral Design: A Crucial First Step
Before you start carving, sketching your floral design is a vital step that sets the foundation for your work. A well-thought-out sketch allows you to plan the layout, proportions, and details of your pattern. It’s a bit like drafting a blueprint before building a house; it saves time and helps avoid mistakes.
Art is the most beautiful of all lies; it is the truth of creation.
Consider experimenting with different designs on paper before committing to your wood piece. This trial and error can lead to breakthroughs in creativity, revealing patterns that resonate with you. Plus, having multiple sketches can help you choose the best design to carve, ensuring you’re excited about the final product.
Moreover, don’t hesitate to use reference images from nature or art to inspire your sketches. Observing real flowers can significantly enhance your understanding of their structure, allowing you to replicate their beauty in your carvings. Remember, your sketch is just the beginning of your journey into bringing floral patterns to life.
Mastering Basic Carving Techniques for Flowers
Once your design is ready, it’s time to dive into the carving process. Mastering basic carving techniques is essential for translating your sketches into wood. Start with simple cuts and shapes, focusing on creating the distinct petals and leaves of your floral design.
A common technique is the stop cut, where you make a shallow cut to define the edges of your petals. This technique helps create clear lines and depth, making your flowers look more realistic. Additionally, using a push cut can help in shaping the curves and contours of your petals.
Choosing Tools Affects Carving Quality
The right selection of tools and wood type is crucial for achieving detailed and beautiful floral carvings.
As you gain confidence, you can experiment with different techniques like relief carving or chip carving, which can add dimension to your floral patterns. Each method offers unique results, so don’t be afraid to explore and find what resonates with your style. Practice is key, and the more you carve, the more skilled you will become.
Adding Depth and Dimension to Your Floral Patterns
Creating depth and dimension in your floral carvings can elevate your work from ordinary to extraordinary. Techniques like undercutting can help accentuate the petals and leaves, providing a more lifelike appearance. By carving away material underneath certain areas, you create shadows that add depth to your design.
Incorporating varying depths within your carving can also enhance realism. For example, making some petals slightly deeper than others can mimic the natural layering of flowers. This technique requires careful planning, as you want to maintain balance and harmony in your design.
Finally, don’t forget about the role of light and shadow in your carvings. Consider how light interacts with your floral patterns, and use that to inform your carving technique. By understanding how to create highlights and shadows, you can add a stunning dimension to your work.
Finishing Techniques to Enhance Your Floral Carvings
With your floral pattern carved, the finishing touches are where the magic happens. Proper finishing not only protects your work but also highlights the intricacies of your design. Sanding is typically the first step, smoothing rough edges and ensuring a polished look.
After sanding, applying a wood stain or finish can bring out the details of your floral patterns. Different finishes offer various effects; for instance, oil finishes can enhance the natural grain of the wood, while lacquer can provide a glossy sheen. Choosing the right finish can significantly affect the overall appearance of your carving.
Sketching Sets the Foundation
Sketching your floral design before carving ensures proper planning and enhances creativity during the carving process.
Lastly, don’t forget to allow adequate drying time for any finishes applied. Rushing this step can lead to unsatisfactory results, so patience is key. The time invested in finishing will pay off when you see your beautiful floral patterns shine in their final form.
Inspiration: Learning from Master Wood Carvers
One of the best ways to enhance your floral carving skills is to learn from the masters. Studying their techniques and styles can provide invaluable insights into the art of wood carving. Many experienced wood carvers share their work online, offering tutorials and tips that can help you refine your craft.
Consider joining woodworking communities or attending workshops where you can observe skilled artisans at work. These experiences can be both inspiring and educational, allowing you to ask questions and gain hands-on experience. Plus, connecting with fellow woodcarvers can open up new avenues for collaboration and creativity.
Finally, don't hesitate to seek out books or online resources dedicated to floral wood carving. They often contain detailed illustrations and step-by-step guides that can further your understanding. Remember, every master was once a beginner, and learning from those who have walked the path before you can greatly accelerate your journey.